Without moulding....
 Then with moulding...

(I really like before and after photos)
Then with moulding...
(I really like before and after photos)


After getting a few nice compliments on the panel wainscoting project so far, I feel I should probably fess up to a little mis-nailage that occured. Since the wainscoting cap sits on top of a 1x4, I nail (with a pneumatic nail gan) from the top to secure the cap in place. I'm not sure what happened here. I just didn't align correctly or something. I've been trying to push through, pull it out, nail it back up and it's just not budging.
So, I guess I'll just leave it as a conversational piece.


 Pretty tough looking little guy, isn't he? But with a name like XP180, how can you NOT be?
 And an after view from the inside:
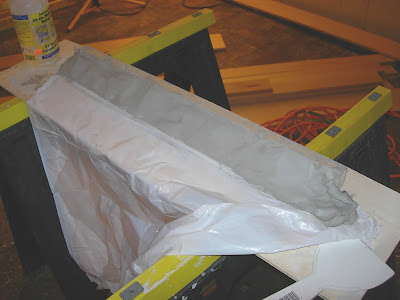
 This is where it stood for about 2 weeks while I waited for a dry few days. I had installed adhesive flashing (similar to house wrap) to seal it from rain:
And the final outside view. I still need to caulk and apply a few coats of paint, but that's going to have to wait until spring:


With new 1/4" plywood covering subfloor:

Applying thin set mortar (special to wood subfloor) and installing tiles:

Applying grout:

The finshed product:


 A closer look into the hideousness:
 In the interest of time, I was able to slap a couple of 2x4s to rebuild the sill but I was rushing since I had already spent the good part of the day removing the old door and darkness wasn't too far off. I needed to get that 80 x60 hole filled with something- it was cold outside. Guy was a big help in nailing the 2x4s to recreate the rough opening and we were able to get the door inplace before long. However, after finally getting something to eat, I got a chance to have a look at the work I had done. That's when I realized that I had placed the door incorrectly. It was installed on the floor, not the subfloor. This meant that the bottom piece would be sticking up almost an inch higher that what it was supposed to be. That would have driven me crazy.
It turned out to be a blessing though. I was able to give some more thought on how to reuild the sill and the next day, I was able to spend more time on that since I had a head start. Working at a slower pace for stuff like this is vital and I enjoy it a lot more.
Here it is, the newly built sill:

 Regarding the French Door itself, it's up and working beautifully. I really like it and much more than I thought I would. However, I still need to finish up the siding on the outside in the vincinity of the door so I'm going wait on posting any pictures until that's complete.


Next picture is running the tool over the clay. I had to do this several times to take small layers off each pass. Tonight was a good learning experience in this little craft, in that you can't take too much off in one pass because the clay will "tear" off. I also found out that keeping it fairly wet decrease the chance of reapplication of clay. If it does tear or if I found a blemish, I would just reapply the clay and start over. But that's no fun. I really dislike rework.
 The finished product:

Tonight I was able to make about 90" of the trim in a matter of about an hour and a half. Here are the 4 sections place on the floor to dry out. I placed them against the wood studs to keep the straightness. But wouldn't it be funny if one of the studs was bowed? Hysterical.

 And a picture of the forming tool IN the jig (this should clear up any fog):

The first trial run:

 After letting it dry out a few days, it is firm enough to handle but still slightly wet that modifications can still be easily made. This is same piece on my counter. This practice piece is fairly rough and the final pieces should turn out much smoother as I will put more time into it.
But it works!


