After 2 weeks and nearly 50 hours of work, the kitchen floor is finally complete.
In 2003 I did a
remodel where I removed unusable attic space and installed an upstairs bathroom, enlarged a bedroom and tacked on a balcony. After the demolition of the original roof, I kept the old full dimensioned 2x4s for sentimental sake and also in case I might have a chance to reuse them again.
In the design stage of the current kitchen remodel, I came across an interesting wood and tile inlay and the thought occured to me to finally utilize those old 2x4s. To give it more of a worn look, I had them sandblasted. Here are some close up shots.


The next picture is the collection of split 2x4s after coming from the sandblaster. Earlier, I had cut these to size and checked for nails before running through the bandsaw by Kevin Reedy, who would later become the cabinet maker. He was a reference from my
dining room table maker, Dennis.
The kitchen that I'm remodeling was a later addition at the back part of the house. As a result, the floors are at different levels so I had to add some 1/4" plywood to bring it to the same level as the adjacent dining room.
Before installing the 2x4 halves and bricks, I first laid out the centerlines of the 2x4s based on the location of the sink and range for symmetry.
Once the 2x4s were nailed in place, I installed Durock as a solid foundation for the brick veneers to be install on.


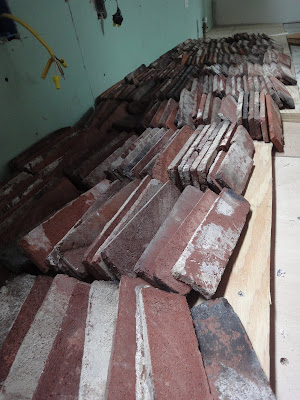
Here's a shot of the brick veneer lined up to be installed. I purchased through Holbird Enterprise and the brick is from the Alabama Charcoal Co. in Oklahoma, so lots of character and various colors on the faces.
Thin setting and brick veneer install. I only worked a small area at a time, since there was a lot of cutting due to the angles. After a section or two, I got a good process down and it went fairly smooth, although I felt it in my back the following day, that's for sure.
The grouting was a bit more of an unexpected challenge. The grout tended to adhere to the brick face much more than a glossy tile face so clean up was a bit frantic. I ended up taking a day of "vacation" the next morning to scrub the brick faces to get as much grout off as possible. Later, they went through an acid wash by Gary and that made a huge difference.


More finished shots below.
The two wood "rugs" were strategically placed in front of the sink and the range since a lot of standing is spent there. I figured standing on wood rather than brick would be easier on the body over time.


