Sunday, October 31, 2010

Wainscot Prep


A pile of pre-cut wainscot sitting outside, ready to be stripped.


For Halloween this year, my costume consisted of a breathe respirator. Not very scary I realize, but helpful in keeping the lead dust out of my system, which could result in a pretty bad scare. As mentioned in previous posts, old wainscoting was found in the demolition of the bathroom and the thought came to utilize the original wainscot rather than buy new. What seemed like a green/environmentally-conscious and inexpensive solution is actually just the opposite. Not only is the lead dust harmful with cutting, but having to remove the extra gobs of paint on the panels is expensive and fairly nasty due to the hardcore paint remover.


On the positive side, the wainscot will have loads of character and can remain in it’s original home.


Saturday, October 30, 2010

Drywall Finish


The long, tedious process of finishing the drywall begins....


The drywall hanging came at a perfect time, since I was off to Colorado for a work trip soon after and Gary could have the house to himself to do his magic on the drywall finish. It’s November 19rd as I post this and the drywall finish still

continues, but it’s looking very good


.

Sunday, October 24, 2010

Drywall Attach


Here is the ceiling, all hung with care (with drywall).


About five hours was spent this Sunday hanging drywall. Starting with the ceiling, we rigged up a 2x4 about 2 inches from the top of the wall for one edge to sit. One person held the other end, while the other person frantically screwed the wall in place (or fetched screws from the ground, or retrieved the dead battery for the drill). It was nearly a Laurel and Hardy episode


.

Saturday, October 23, 2010

Sheer Panel

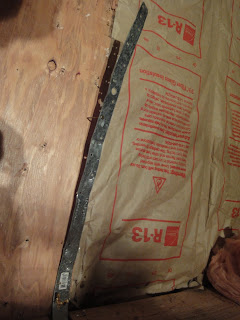
Hand nailing the 3’ strips to the sheer panel.


In order to meet code when I did the attic remodel, sheer panels were install at the corners of the back of the house to meet wind and seismic loads. I had to tear these out with the bathroom remodel, so here we are putting them back in. Gary handled the nail gun part of the project and I did the hand nailing.


Thursday, October 21, 2010

Insulation


The bathroom walls finally see some insulation after over 100 years of nakedness.


Before installing the insulation, I remembered a few important items to take care of while I still had access, namely fire stops and wiring clean up. After a little research I learned that fire stops are critical in saving (or delaying castastrophic damage) a home when a fire breaks out. My home isn't balloon framing, but I had created openings in the floor which essentially acts like a flume if there is a fire in the basement.


Once I got those out of the way, Gary was set to insulation and did a great job installing the insulation while I was away at work. I gotta tell ya - coming home and seeing this was a big surprise and it was nice to have a day off! Of course, I had to give Gary a hard time for installing the insulation upside down...


Sunday, October 17, 2010

Exhaust Fan Install


Exhaust fan - all ducted up and wired. Ready for action. Bring it, stink!


About an hour job, but another line item crossed out, the exhaust fan is done! It only took one exhaust fan, two feet of duct, and a $25 back flow flap mounted on the outside as seen below. Sawzalling through that blocking, plywood and 3/4” siding was the most difficult part. That reciprocating saw is my most appreciated tool in the box.


Wednesday, October 13, 2010

Window Install


Here I am nailing in the studs for the new window to attach to.


I rushed home after work and started this endeavor at 5:30, know

ing that I had little time before darkness fell upon us. Fortunately, the previous window was held in only by the molding from the outside so little time was needed on that. Overall it went well. Adjusting the window placement from the outside wa

s a challenge because I built the frame too tight. It eventually straightened out though after a few expletives. How many expletives does it take to straighten a newly installed win

dow o

ut?


The original window is on the left. When I was working to get it out, I twisted it unknowingly and the glass just exploded right in my ear. No blood though. I was lucky.


Window removed. It reminds me of a missing tooth.


New frame built for window to attach to that I was particularly proud of. The old windows were literally attached to the exterior trim molding.


Ta-da!

Wednesday, October 06, 2010

Electrical Rough-In


Okay, if you survived that last post on the plumbing, may you be rewarded with a post on......

roughing in the electrical!


As I write this, I’m waiting to get an electrician in to kind of give me the go-ahead, pat on the back, whatever to make sure I know what I’m doing. It’s possible all these picture may be for nothing in case things change.

Saturday, October 02, 2010

Plumbing Rough-In


Plumbing. What can I say? So important, but pretty boring to blog about.


For this part of the remodel, I hired out. If anyone needs a sharp, young, energetic, inexpensive, down to earth plumber - let me know. I got just the guy for you.