Tuesday, October 09, 2007

Leak From The Sink

On Saturday morning I woke to a fairly large puddle in the downstairs bathroom. Such a drag. Fortunately, I didn't have any solid plans for the day so I was able to tackle the problem quickly. Here is the culprit - the connection point from the galvanized pipe to the copper.


Why they chose to use a 6" galv extension instead of extending the copper, or using longer flex lines to the sink is beyond me. Perhaps they liked the rusty water flavor it provided when not used for several days?

I have little experience with plumbing, so I gathered as much info on my situation on paper and headed for, not Home Depot, but a local plumbing store, George Morlan. They immediately had a much better solution than I had in mind and I was out, back home, hacking off the valve and galv pipe right at the copper line.


All I needed to do was install the valve right at the copper line, using compression fittings so I didn't need to solder. Then I ran the flexible pipe from the valve to the sink and that was it.


After Inspector Scully approved my work, the hideous sink-cabinet was back in place and I was done!


Sunday, October 07, 2007

Toilet Fix

Now that I got this blog up and running again, there's no stopping this next post. After all, this is a house blog, and toilets are a part of the house that sometimes need fixing.

New toilet components:

Old toilet components:


Finally, no more annoying leaky toilets. After a good 4 months of the internal dripping getting progressively worse, I took the initiative - the bull by the horns, if you will - and spent about 45 minutes making the repair.

Aren't you glad you looked at this post?


Maybe tomorrow I'll go into a detailed post of how I scrubbed the kitchen floor. Or how I replaced the paper towel rack!

Tuesday, September 18, 2007

Labor Day Painting

Last year at Labor Day, I used the 3 day weekend to paint part of my house. Since house painted is such a daunting task, I decided to break up the painting into sections. Three day sections. Every year in the beginning of September. And this was the 2nd annual Labor Day paint fest with the area of interest being the upper half of the west side of the house. It's not exactly the most enjoyable since I'm up about 15 feet in the air on a ladder, but it's amazing how quick you get used to it


It's really not too much to show, but here it is:


Before:


After:

Monday, September 17, 2007

More Dining Room Art

While waiting for the paint to dry during the Labor Day project, I took a bike ride downtown to Art in the Pearl, where I had found the "Imagined Forest" piece the prior year. From what I was told, there are 900 applicants to this show and only 90 are chosen, so you can imagine there is some pretty darn good stuff.

One particular artist caught my eye, not because her media was presented on metal and I like shiny things, but because one of her pictures was of trees, similar to the "Imagined Forest" that I just purchased. It turns out she is good friends with the artist of "Imagined Forest", Jim Brown. Not only that, her and her husband were at the University of Kansas the same time I was. And to think I never ran into her in the drab engineering hall...

So here it is. There is no title, but it's of a monastary in New Orleans. I think it compliments the "Fiddler's Light" pretty well, which hangs at the opposite wall in the dining room.


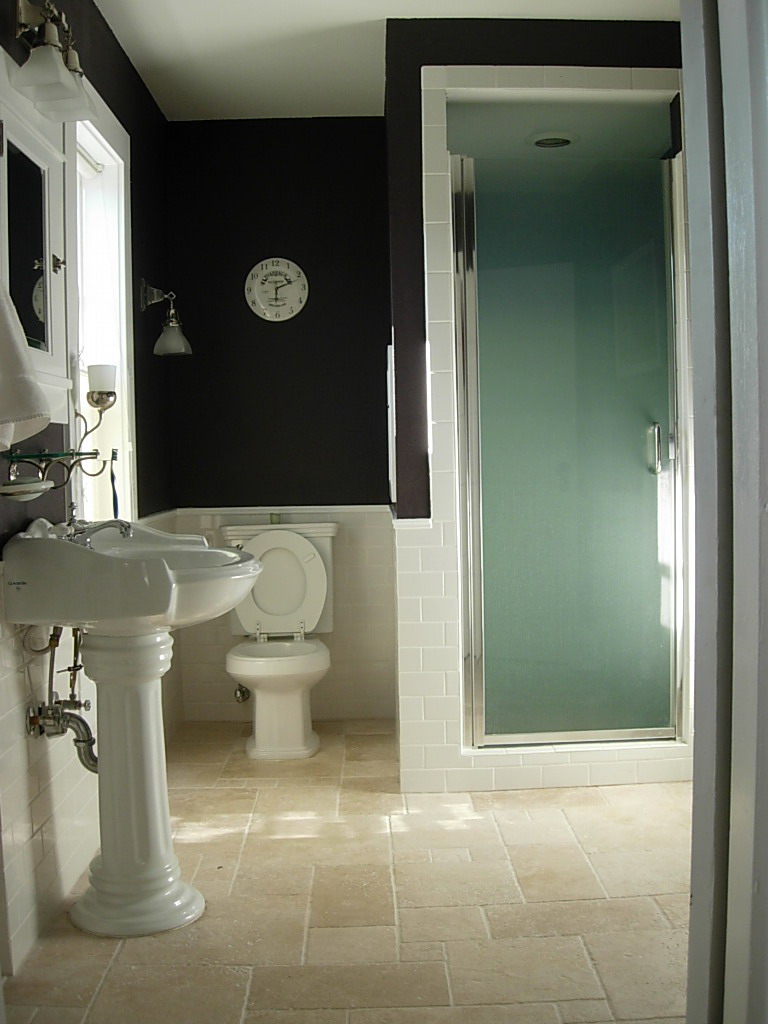
The picture is actually a photo transferred to a polaroid, then split off with heat and attached to a sheet of aluminum, that is raised off of another sheet of aluminum. I liked that extra dimension that gives, so when I hung it, I raised the picture off of the wall, giving it yet another layer. The darker border around the picture is the same aluminum sheet except that it's sandblasted. What's really weird is that the border matches exactly the color of the dining room wall. Though the picture is small for the large wall, I like it for now but I'm thinking this picture would also look great in the upstairs bathroom, with the shiny metal against the dark aubergine walls.


The artist is Chris Dahlquist. She has a lot of other great stuff so check out her website.

Saturday, September 15, 2007

Leaky South Window Fix

For Labor Day I decided to celebrate by being laborious. Actually, the truth is that the wet Portland winter is just around the corner and I really needed to rain proof my picture window in the front of the house that faces south. Though it's not that obvious in the picture below, the ship lap siding above the window is cracked. Water leaks can sometimes be maddening to find, but I'm fairly certain this has got to be the reason. By the way, other than mowing the lawn and general house chores, this is the only work I've taken on with regards to the house since finishing up the dining room remodel. Hence, a stale blog.

I was a little worried that once I got the old boards off, I'd be looking at dead air space (no insulation), but fortunately I uncovered some insulation so the project would continue as planned. One thing I did find was that there is no blocking from the first floor wall to the second floor wall. This is beneficial, I am told, from major damage should a fire break out by slowing the flames from spreading to the second floor from the first. Obviously, it would have been wise to take of this now with the siding off, but there's only so much time.
With the new boards on:
And the final product:


Sunday, June 24, 2007

New Chandelier

The new chandelier from Hubbardton Forge in Vermont arrived yesterday. Based on the comments from my mom, dynochick and one Ted Morgan, the result is a simple cast iron 8-light chandelier. This does it for the dining room remodel for now. There's nothing more and it feels great!


Friday, June 15, 2007

Imagined Forest

On Labor Day last year, I went down to Art in the Pearl in downtown Portland to support some fellow irish musicians performing there. While having a look at the art, I came across Jim Brown's spot and really liked what he had. The problem was, I didn't really have a place for it at the time. Well, I did but it wouldn't have really fit or looked very good against the beige walls. That is until I painted the den !

Wednesday, June 06, 2007

Den Revision

Lately, the focus of the blog has been on the dining room remodel. In fact, that's actually the reason for creating the blog - a means of relaying the remodel accomplishments to my ever so curious family in St. Louis. But since the dining room is just about done (chandelier arrives in a few weeks), and I want to keep this blog alive, here's some work that has been going on in the den, or the front room.

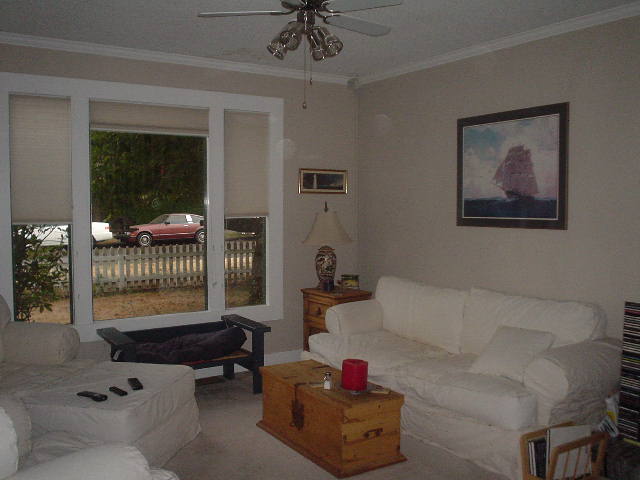
Before, the den had tan colored walls, and with the light carpet, the white canvas uphosltered furniture made the room fairly bland. I decided to give the room a little more kick and painted the walls a greyish-blue, as well as the ceiling a light yellow. I am very happy with how the wall color goes with the new floors. That blank wall in the picture below will soon be filled in with some art that I'm waiting for.


Oh yeah - and I also got a new TV. Since none of my friends come over anymore to watch games because I'm the only one with an outdated TV, I had jump on the HD wagon. Though I'm not a big TV watcher, I'm really liking it.


Here's what the den looked like before:


Friday, June 01, 2007

Fiddler On The Wall

It's a pretty sure sign that the dining room is close to completion when I start hanging pictures on the wall. But it's actually not quite complete. I have been searching high and low for a chandelier for the last week and haven't quite got there.


I picked up the Fiddler's Light yesterday after work from the neighborhood framer and hung it within 10 minutes of stepping inside. Then rehung it, and rehung it again.

Thursday, May 31, 2007

Window and Door Blinds

Several years ago, I came across Hunter Douglas honeycomb blinds through my friend Chris Berg. I remember how excited he was and he went on and on (which Chris sometimes does) about how great they were. Chris has good taste, so that sold me. Ever since, I've used them whenever I need window coverage. Some of the perks are that when retracted, they hardly take up any space so all the more light can enter. They also have a "top-down" feature (shown below) and has a good insulation factor with the honeycomb design.

Wednesday, May 30, 2007

Chairs For The Table

For part of my weekend, I was able to obtain the chairs for the dining room. They're nothing fancy since I've already gone a bit over the top on the table, but I'm surprised how well I like them. I didn't want to go with a wood look since I already have the doug fir table on the doug fir floors. So, I opted for the black painted wood chairs. The table has plenty of black markings from what I believe is oxidation, and the black chairs really bring that out more in the table, as well and match up with the woodstove. All in all, it exceeds my expectiations of how well it all looks together.

Tuesday, May 29, 2007

The Little Lilies

As I was waiting for the floor refinisher a few Wednesday morning's ago, I had a chance to see and capture the miniature lilies blooming in the front garden. Of course, I must take the classic shot with the house in the unfocused background. After all, it IS a house blog.


Friday, May 25, 2007

The Dining Room Table - Complete

The reason why I love my house as much as I do is because of all the character it has: the many corners, the funky roof lines from with inside. When it came to obtaining a table for the newly remodeled dining room, I wanted something with equal character. Last night I picked up the table that I had Dennis at Brave New Wood build out of reclaimed timbers. I don't think this table could have any more character, and it really looks like it's 100 years old - just the way I wanted it. I also really like how the feet turned out. All that cutting and template making was worth it.


Now I just need to get a chandelier and some chairs and the dining room's a wrap.


Wednesday, May 23, 2007

Dining Room Painted

Last weekend I painted the den walls, the panel wainscoting in the dining room, the den ceiling and finally the dining room walls. It was a long arduous weekend but I had to act on the motivation the newly refinished floors gave me.

Here's the dining room so far:


The color is called "Tankard" and is more of a brownish-gray, in case it appears different on your monitor. It's a Miller Paint color, but I had them mix it in Benjamin Moore. I selected the color on a whim, and I'm surprised how much I like it.

Tuesday, May 22, 2007

Floor Grilles

I had posted something before regarding the new floor vent, but just had to show the finished product with the new paint job against the newly refinished floor. Here is the cold air return at the opposite side of the dining room. It's cast iron from Reggio Registers.


Monday, May 21, 2007

Fiddler's Light


A few years ago, I came across this photograph and instantly loved it. I love the beam of light, the two gents laughing in the back, and the irish pub feel with the abandoned glasses on the piano. When I decided to take on the dining room remodel, this photograph came to mind that it would need to go on one of the walls.


While I was getting my floors refinished, I needed to be out of the house. Since it was spanning over a weekend, I took advantage of some time off and a good plane fare to New York City to explore the streets, subway, and feel the beat of that great city. I had been in contact with the photographer of "Fiddler's Light", Jill Freedman and was proceeding with the order and 'ship to' address when it occured to me, that with her New Yorker accent, she was probably IN New York. Duh. That's when I bagged the shipping idea and met with her. She's a wonderfully fun person with a great wit to her and very kind. If you get a chance, check out her photo website. Jill's got some fantastic photos.


Saturday, May 19, 2007

Floor Refinish In Entry Room

In the front door entry section of the house, there is an oak parquet floor. This turned out great with the floor refinish because the parquet is made up of various species of oak and shows different colors. Of course, you can't really see it in the after photo, so you'll just have to take my word.


Friday, May 18, 2007

Floor Refinish In Office

In continuing the floor 'before and after' series, the office floor probably saw the most effort in the refinishing of the floors. This is because half of this room didn't exist when the house was first built so there was a completely different floor on the north side that had to be completely removed. To get the new boards to match, reclaimed floor boards from another building in town were needed, since old growth has a much different look than new growth Douglas Fir.

David at Boardwalk Floors explained that he had to use several thicknesses of plywood below in order to shim to get the floor level. My neighbor also explained that David was there before she left in the morning, and worked well into the evening. I highly recommend him, if you're in Portland.


This is a little closet in the office:


Yesterday, I came across this post, which made my day.