Thursday, July 13, 2017

Potting Shed Painted And Nearly Done

Here is the potting shed all painted. Many more final details were to come after this point, like window boxes, internal shelves and walls, hanging pots and water spigot install and a sink and on and on. But, for the purpose of the blog, this is a good stopping point.

As I was putting the finishing touches on the exterior of the potting shed, I would often get comments from passerbys asking if I was making a tiny house or if I was planning on putting it on Airbnb. My response was that it was just a potting shed but that I made it a little more interesting for myself. However, I couldn't help my mind wander. What else could I do with such a structure...


Sunday, July 02, 2017

Electricity Comes To The Potting Shed

Here are some early photos of the shed after adding some craigslist found chandeliers. I later went to add some string lighting for a much more calmer effect.


Friday, June 16, 2017

Window and Door Install

One of the more rewarding aspects of the potting shed project was using some reclaimed material. The three windows came from our neighbors across the street. They were redoing their sun patio, and Gary happened to see this and asked what they would do with the old windows. Since they were just going to trash them, we ended up stashing them away for about 3 or 4 years in hopes we could use them. We finally did.

The doors came from "rebuilders center". Not as cheap as the free windows but worthwhile.


Tuesday, June 13, 2017

Potting Shed Siding

To match the siding on my home, I added this dutch ship lap siding to the potting shed. It was fairly expensive but worth the character it provides. Also, so easy to cut and install with a finish nail gun. 


Monday, June 05, 2017

Roof Rafters

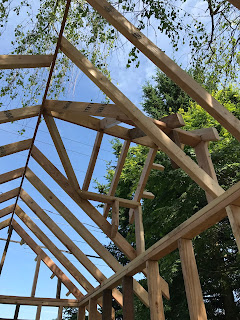
Well, my last post confidently stated how easy framing the walls were. As for roof rafters, it was a completely different story. Not impossible but certainly challenging. Most likely due to having to build it while balancing on a ladder.

And that dormer... I think it took about 7 hours and many cuts. But I love a good challenge. It was worth it.


Wednesday, May 31, 2017

Framing the Walls

I like framing. It's not extremely challenging just as long as you have measured everything correctly. The outcome creates a bit of excitement as you can start to see the shape of the building take place. I was able to get the walls framed in about 16 hours and it went pretty smooth.


I


Friday, May 19, 2017

Concrete Pad Pour

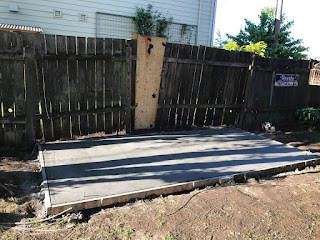
When I first decided on the floor being concrete, I figured I'd just do it by bags and a mixer. But after a few folks comments on getting it delivered, I looked into that. It turns out, after all expenses of mixer rental, bag delivery, the cost was only about $14 less to do it all by hand. Naturally, I went with the concrete mini mix delivery to save my back.

I was able to get it scheduled just before having to take some time off to entertain out of towners so the timing was perfect. It literally only took 10 minutes to get it poured and fortunately my neighbor happened to being around and helped me scree it, and even did the first smooth float.


Wednesday, May 17, 2017

Concrete Pad Prep

For the potting shed floor, I decided on concrete from my experience of stepping through the floor of the shed that existed on the house when I bought it. I also liked the idea of being able to sweep and clean it easy.

I first had to dig out the space for the slab and a good 6" below it. With the birch tree right next to it, it delayed progress as I had to cut through a lot of big roots. I'm hoping I don't loose the tree actually. The next challenge was getting around all my "utilities" that multiplied through the years- sprinkler system, landscape light lines, drip irrigation and the electrical wiring for the outlet of the previous water fall.


Monday, May 15, 2017

Deconstruction of the Old Shed

Now with the design established, it was time to deconstruct the shed that I had built 16 years ago. It took longer than expected which made me proud knowing that I built it well. I kept all the leftover lumber to be reused in the next shed. And anything not worth keeping gets collected as firewood.


Saturday, May 13, 2017

Potting Shed Design

The blog is back. After nearly a 4 year break, I've taken on another project on the 1900 Farmhouse worth blogging about- a potting shed. Though the idea of building a potting shed has been in the works for a few years, I'm finally going for it.

First step is the style of shed that I wanted. There are a ton of great ideas on the web but I landed on just matching the design of the house. Dormer and all.

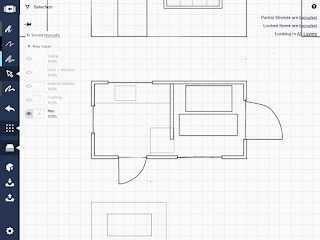
Next step is laying it out on paper. Below are some captures of the design using an app on my iPad called Concepts. It took awhile to get the hang of the app and many frustrating moments of: "why don't I just do this on paper", but after a good few hours, it all clicked.

I also created a framing diagram to get a better feel for how much lumber I'd need as well as work out details and questions before cutting the 2x4s.
 

The plan view shows there will be two sections of the potting shed- one for storage of lawn equipment and another for a work area.