
Then I smoothed the surface out, ready to be tooled:
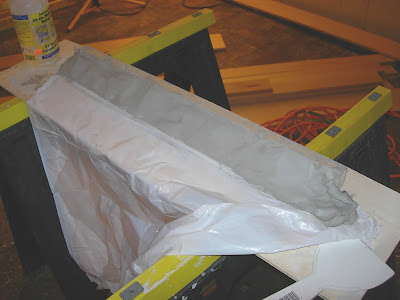
Next picture is running the tool over the clay. I had to do this several times to take small layers off each pass. Tonight was a good learning experience in this little craft, in that you can't take too much off in one pass because the clay will "tear" off. I also found out that keeping it fairly wet decrease the chance of reapplication of clay. If it does tear or if I found a blemish, I would just reapply the clay and start over. But that's no fun. I really dislike rework.
 The finished product:

Tonight I was able to make about 90" of the trim in a matter of about an hour and a half. Here are the 4 sections place on the floor to dry out. I placed them against the wood studs to keep the straightness. But wouldn't it be funny if one of the studs was bowed? Hysterical.

8 comments:
I absolutly love this. So what happens next. Does this need to be fired, or do you just paint it and install it? What type of clay is it?
Greg- Thanks! The next step, ideally, is to let it thoroughly dry then it is bisque fired. After that, I will apply 3 coats of glaze, then bring it back to be glaze fired. The type of clay is called "wonder white structural", but there are many, many other types of clay. Just check with your local ceramics place.
Getting ideas for the Bathroom Greg?
Looks great Joe! Is the 'trim' staying in those long sections or are you cutting it to match the length of the 'oak tree tile mural' tiles?
Hi Angus- I'm planning on cutting the simple 8" pieces when it is wet. For the angled pieces, like for the corners, I'm going to cut with a tile saw after it's bisque fired, but prior to glazing.
But to answer your question, I've decided to match the seams of the trim to the oak tree tile.
What a cool idea. I wonder if I could apply the concept to concrete? If so, I would make some post tops for stone, and maybe a lintel.
ttfweb- I would imagine that this could be applied to concrete, but you may have to get the moisture content just right to get a smooth cut with the tool. I'd like to hear if you try it and how it works.
By the way, thanks for the great tip on stat counter. Since going to your site, I've been using that to watch traffic at my site.
Also, I believe you are in Oregon?
Hi Joe, I've been wondering how this turned out?
Chris-
Dang, I was afraid someone would ask. Truth be told, I have about 5 other projects on the dining room going on so the oak tree tile trim is taking a back seat at the moment. But to answer your question,it's turning out well so far. Once I get back on this, I'll definately post pictures. Thanks for checking in and caring and all that.
Post a Comment