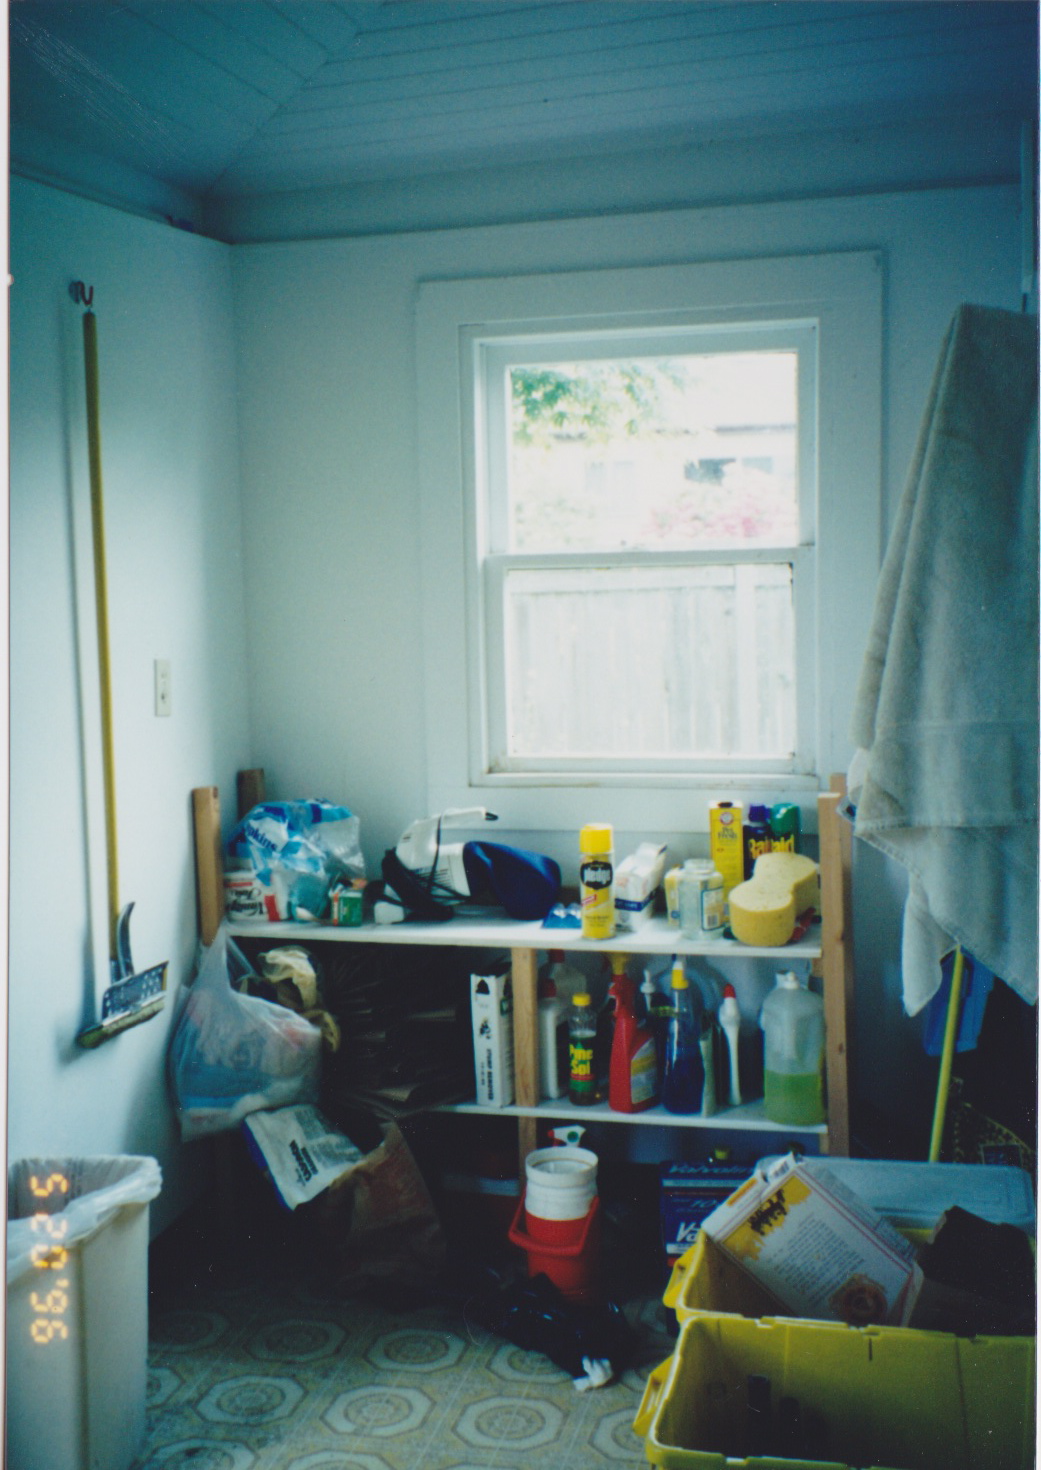
When I completed the kitchen in May of 2011, I decided that the pantry remodel could wait while I reestablish a life once again. I also just wanted to enjoy the summer. So, I've been chipping away at it on a slower pace than what I usually do. But a good year and a half later, it's complete. Here are some 'before' shots to start with.


And some 'after' shots, these of the east wing of the pantry:


I actually built these cabinets and doors- the first cabinet building project I took on. It's pretty basic and rough but works. I also came up with the idea of using fabric behind a heavy duty screen for the doors, for color and simplicity.


I'm using glass containers to store oils, dried goods, baking stuff, excess spices with common label types. It's pretty cool cause no one makes fun of me for this characteristic of mine. I also realize it's not the best way to store since light can break down flavor.


And now for the west wing of the pantry. The washer and dryer is relocated and a garden window is installed. It completely changed things for the good with loads of light.


I had a hard time coming up with an idea for a floor. I almost did brick, but that would have been too much brick to look at considering the kitchen floor was mostly brick. Another idea was just a simple paint job on the concrete, but I hate stepping on concrete. Wood had been on the back of my mind for awhile but didn't know how to approach it or what type of wood to use. It dawned on me one day to just to get old planks from barns, slap them down and give a rustic (splinterish) feel to it. Actually the splinters aren't bad at all.
Here are the cut planks in various widths. I got these from Aurora Mills Architectural Salvage.

I tried just gluing them to the floor but many planks were bowed and the glue wouldn't hold. Even after adding weigh, it still didn't work. Eventually, they just got hammer nailed to the concrete which did the trick.


3 comments:
Joe, where did you get that fabulous crown moulding? Is it real (plaster), or fake (foam, MDF, etc). How much per foot (roughly)?
If there was a blog called "Label Porn", you could totally submit these pictures....
Looks amazing!
JC- the crown moulding is what is used for tin ceilings. It's really easy to install, the tricky part is cutting the angle. Here's more on it: http://1900farmhouse.blogspot.com/search?q=tin
Anon- If there was a blog called label porn, I'd probably be the owner of it!
Post a Comment