Showing posts with label Bath Remodel. Show all posts

Tuesday, April 19, 2011

Clawfoot Tub & Fixtures


I got this 67" slipper from Signature Hardware. The have great customer service and I highly recommend them. The bottom is painted "Hollingsworth Green" by Benjamin Moore which will match the bathroom ceiling, for balance.

The fixture close up for the clawfoot tub. Also from Signature Hardware.

The fixture for the vessel sink is from Belle Forte.


Bath Vanity Sink

Sharon Greenwood Pottery (former Creative Director gone potter) made the vessel sink for the bathroom. It originally started with just the shape. Then I mentioned it'd be cool to have some relief design in there but I wasn't quite sure what it would be. After showing me some pattern samples, we somehow got on the fleur-de-lis concept, then the pie plate shape. The whole process went great and was a lot of fun to see it develop.

The results blew me away. 

Photo credit: Sharon Greenwood

Photo credit: Sharon Greenwood


The vanity is white carrara marble sitting on a simple black antique cabinet


Thursday, November 18, 2010

Magazine Rack

When I did the attic remodel back in 2003, a little light bulb in my head went off to add a built in magazine rack next to the toilet. With the advent of great smartphones, I tend to not read magazines during those deeds anymore, but I still thought it would add some character for the downstairs bathroom remodel.

Rough opening between two wall studs...


With the 1x3's cut for the casing...


Using my kitchen countertop on it's last days as a nearby workbench...


Assembled and held in place by gravity...


This was all done by less than par drill bits so it has got its share of flaws but I think it turned out just fine. It will be painted white along with the trim and beadboard wainscoting.

Monday, November 15, 2010

Bathroom Door Install

The bathroom floor was fairly easy to install. Now it came time for something more challenging - hanging the old $75 five panel bathroom door purchased from the salvage section at Rejuvenation. I've done this about 3 times before, none of them have been absolutely perfect, but good enough to be workable and to fool those who know not what to look for.

Things were going fine as I took my time on an evening after work, then all of a sudden 3 issues arose:

1. I cut the incorrect end of the jamb.
2. The floor sloped so bad that it created a half inch inch gap at one end of the door's side.
3. The rough in of the framing was too tight and gave no play for adjustment.

As panic sort of almost set in, I broke for dinner and had a solution after my first bite. I just needed to trim off about 1/4" of the jamb. This turned out perfect since I was able to lower the door about 1/4", meet halfway for the slope of a 1/4". The jamb end, that had a funny angle, could simply be caulked to hide my oversight of cutting the incorrect end. My door, which I had custom cut, still had plenty of room to fit within. The task continued to churn forward.

That first evening took 5 hours and I was up until midnight, but the successful ending made it all the worth it.
There is nothing easy about hanging a door, I've concluded. Even attaching the strike and knob hardware needs to be thought through carefully. It sure is fun opening and closing it now though only for the simple fact of.... because it works!


Saturday, November 13, 2010

Getting Heat to the Bathroom


If there is one thing about HVAC (heating, ventilation, air conditioning) work that I have learned, it's ALWAYS wear gloves. I'll never forget the first HVAC project that I worked on at my house (adding heat to the upstairs) and the next day, when I went to work, my hands were riddled with band-aids, much to the amusement of my co-workers. I eventually spilled some blood on this project, since there were some moments that I needed the fingertips.

When I put the bathroom floor in, I spaced and forgot to locate the heat register. That meant I had to rip up some tile and cut through the cement board. That cement board eats sawzall blades like bar pretzels, so you know!


I had some custom boxes made to fit the old registers I bought at Rejuvenation. Once those were installed, and taped up, running the hard and flex duct was a piece of cake.

Here's a shot of the register install...


A before and after view from below...


Saturday, November 06, 2010

Bathroom Floor Install


Now that I have the wainscoting almost ready, I realized that I needed the baseboard molding in before I could install the wainscoting. But before I could install the baseboard molding, I really should have the floor in. Works for me. I really enjoy installing floors. The outcome far exceeds the work put into it. That doesn't necessarily mean it's easy, just doable.

Since this section of the house is a tad lower than the rest, the floor needed to be built up to make a total of 1.25" thickness. Half inch plywood was cut to fit....


Then half inch cement board....


Making a nice thick floor...

And now for the 1" hex tile (1/4" thick), for the period bathroom look. They are not exactly authentic because I wanted glazed tile for ease of cleaning.


At the door, I needed to support the grout edge so I took one of the floor board samples I'm going to use in the kitchen and installed it as a threshold. I really like the worn antique wood look against the shiny new tile.


Sunday, October 31, 2010

Wainscot Prep


A pile of pre-cut wainscot sitting outside, ready to be stripped.


For Halloween this year, my costume consisted of a breathe respirator. Not very scary I realize, but helpful in keeping the lead dust out of my system, which could result in a pretty bad scare. As mentioned in previous posts, old wainscoting was found in the demolition of the bathroom and the thought came to utilize the original wainscot rather than buy new. What seemed like a green/environmentally-conscious and inexpensive solution is actually just the opposite. Not only is the lead dust harmful with cutting, but having to remove the extra gobs of paint on the panels is expensive and fairly nasty due to the hardcore paint remover.


On the positive side, the wainscot will have loads of character and can remain in it’s original home.


Saturday, October 30, 2010

Drywall Finish


The long, tedious process of finishing the drywall begins....


The drywall hanging came at a perfect time, since I was off to Colorado for a work trip soon after and Gary could have the house to himself to do his magic on the drywall finish. It’s November 19rd as I post this and the drywall finish still

continues, but it’s looking very good


.

Sunday, October 24, 2010

Drywall Attach


Here is the ceiling, all hung with care (with drywall).


About five hours was spent this Sunday hanging drywall. Starting with the ceiling, we rigged up a 2x4 about 2 inches from the top of the wall for one edge to sit. One person held the other end, while the other person frantically screwed the wall in place (or fetched screws from the ground, or retrieved the dead battery for the drill). It was nearly a Laurel and Hardy episode


.

Saturday, October 23, 2010

Sheer Panel

Hand nailing the 3’ strips to the sheer panel.


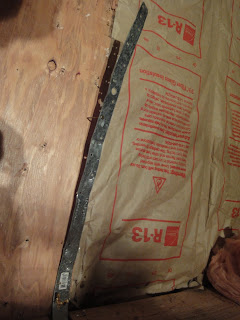
In order to meet code when I did the attic remodel, sheer panels were install at the corners of the back of the house to meet wind and seismic loads. I had to tear these out with the bathroom remodel, so here we are putting them back in. Gary handled the nail gun part of the project and I did the hand nailing.