I've been chipping away at this compilation video from the kitchen remodel for the past several months. and I finally got it completed!
http://www.youtube.com/watch?v=yMeVhbQmmoE&feature=plcp
Showing posts with label KItchen Remodel. Show all posts
Showing posts with label KItchen Remodel. Show all posts
Wednesday, May 02, 2012


Saturday, April 07, 2012
Beer Coming Out of the Wall
After doing the kitchen remodel and adding a new fridge, I held onto the older fridge because I've always entertained the idea of a kegerator. Not only is it convenient, but also saves money and I can have just half glasses if I want.
The basic set up of the tap out of the front door was very easy. I literally think it took less than 45 minutes. I mentioned "convenience" earlier. That was only in respect to not having to buy and recycle beer bottles every week. But the kegerator was located in the basement, and that is not so convenient....until now.
Now, I've made it so I have beer coming out of the kitchen wall!
After some research and discussion with bar owners, I had a solid plan. I bought a small blower and made sure it didn't heat up too much when operation, then cut an opening in the floor, ran 3" insulated duct from the kegerator side to the back side of the wall. Inside the 3" duct is a beer line and a 1" tube connected to the blower which sits on a ledge in the fridge and cools the 3" duct. It works fairly slick, though there is a little foam due to the increase pressure needed to overcome the 10' lift. But the convenience is great, not to mention a slight cool factor...
Here are some detail internal snapshots:
The basic set up of the tap out of the front door was very easy. I literally think it took less than 45 minutes. I mentioned "convenience" earlier. That was only in respect to not having to buy and recycle beer bottles every week. But the kegerator was located in the basement, and that is not so convenient....until now.
Now, I've made it so I have beer coming out of the kitchen wall!
 |
| Now you don't see it. |
 |
| Now you do. |
Here are some detail internal snapshots:
 |
| 50 cfm blower in fridge |
 | |
| 1" tubing connected to blower and ran to upper floor |
 |
| 1" tube and beer line runs inside a 3" duct covered by insulation connected to fridge side |
 |
| 2nd level continuation of 3" duct inside wall terminates to sealed box |
 |
| View inside sealed box showing end of 1" tube and beer line |
Thursday, June 02, 2011
The Latest Of The Kitchen
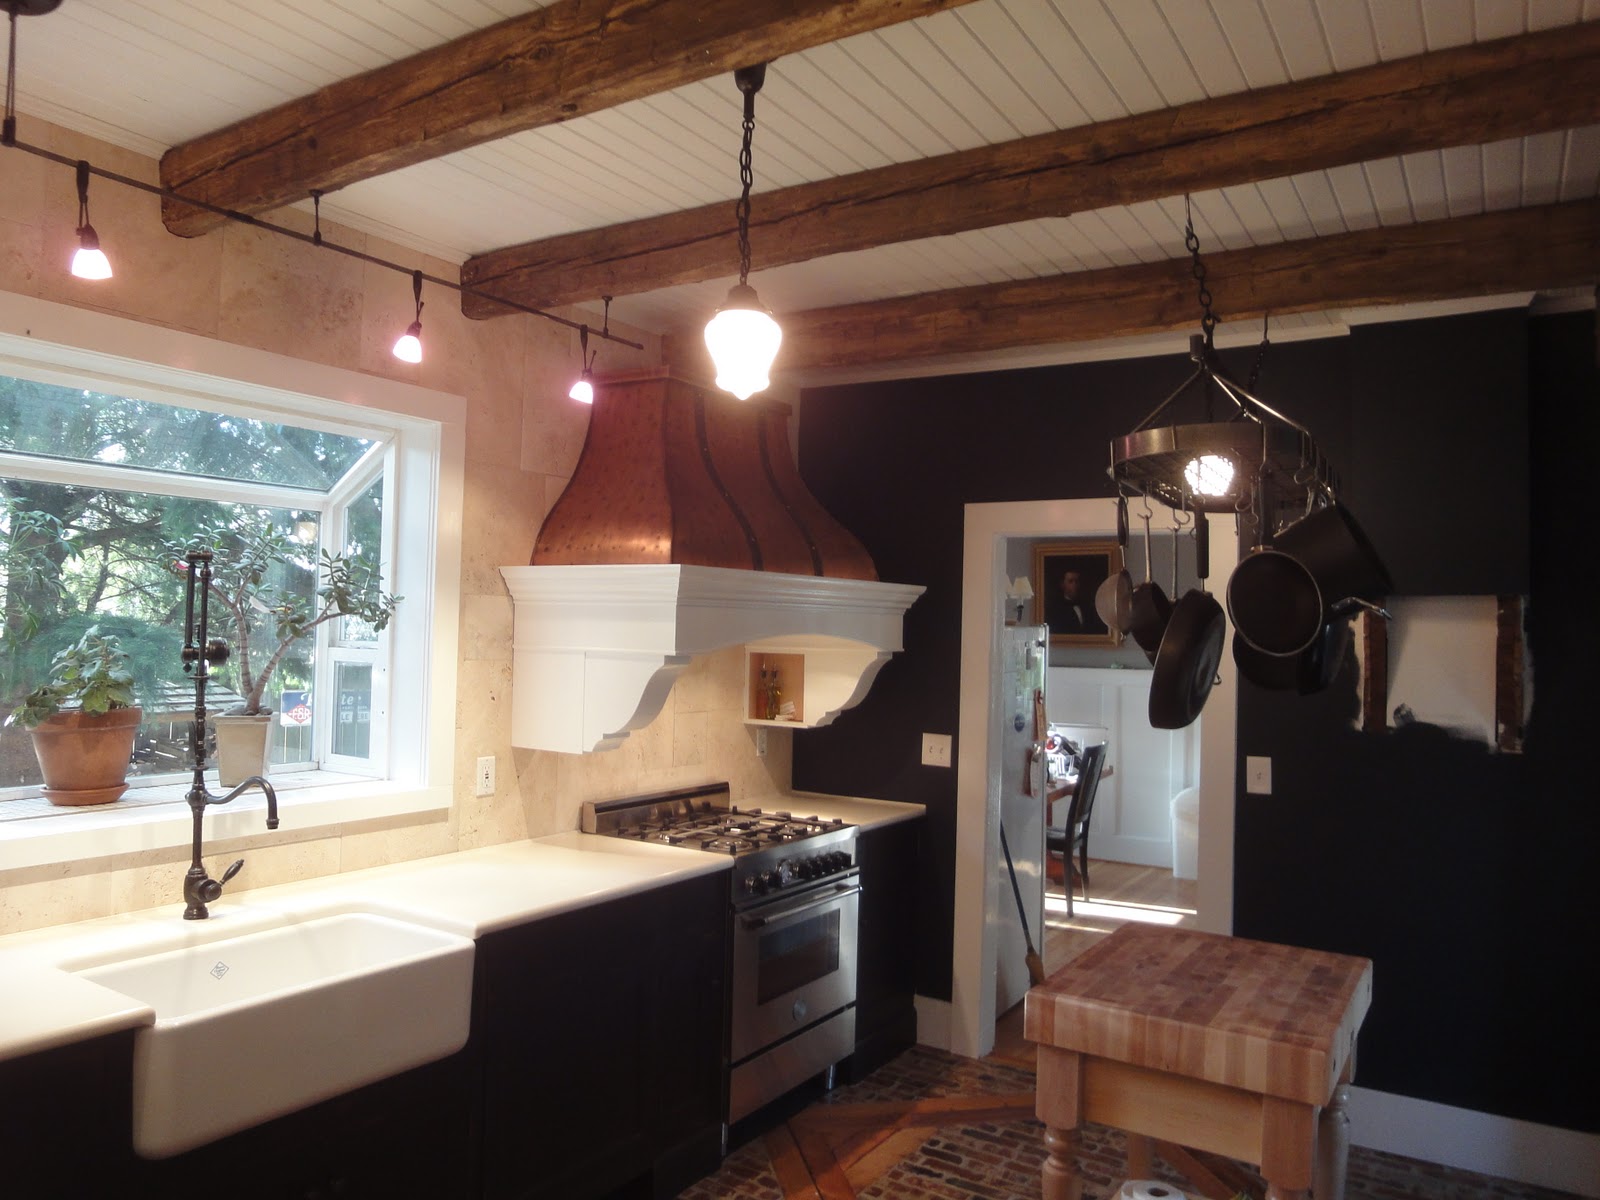
Here are some of the latest pictures of the kitchen. While there's still some small amount of work to be done, these will give a general idea of the completed project.




Saturday, May 21, 2011
Coffered Ceiling
For whatever reason, I really am into interesting ceilings. After spending many dinners out while the kitchen remodel trudged on, one particular place that caught my attention was Caldera, a neighborhood pub named after the extinct volcano about 10 or 15 blocks from my house. Since I stole all their color ideas for the breakfast nook, as well as the bench, I might as well copy the coffered ceiling as well. It was the final main construction of the kitchen remodel and it turned out pretty good.

 |
| The first step was to add furring strips to add depth to the main stiles |
 |
| In mid-stile addtion. |
 |
| After a few coats of paint |

Saturday, May 07, 2011
Cabinet Hardware
The drawer pulls finally arrived which means the drawers don't have to be opened by pieces of tape anymore.


 |
| I copied the drawer pull from the antique table that my mother left for me so I have some consistency. |
 |
| An opportunity to include Scully in the blog. |
Friday, May 06, 2011
Bench Stain
Taking advantage of the combination of a sunny day with staining and varnishing the bench that will go into the breakfast nook. I stole this idea from Caldera Public House, a great neighborhood spot just over the hill. I also stole the color scheme which I will hopefully complete in the next several weeks.


Thursday, April 28, 2011
Wallpaper
In keeping with the whole French country theme, I wanted to include some toile. In looking into this print, it turns out that toile was actually originated in Ireland. However, the french adopted it and used it in more frequency. I've always liked that printed look, and also wanted to do something unique and a bit against the grain of the typical solid color look that everyone seems to be doing. That is why I went with wallpaper. I was a concerned that it'd be too busy and obnoxious and it surprisingly isn't.


Tuesday, April 26, 2011
Cabinet Paint
And the process of cabinet painting begins....


 |
| Painting the mullion white cabinet doors (slowly) in the breakfast nook. |
 |
| The lower cabinets are primed with a red paint as a "primer" or base undercoat. |
 |
| A coat of black is added on top of the red then using a wet towel, I lightly rubbed off some of the black before it dries to give it a bit of a distressed look. |
 |
| A close up showing the distressed look. |

 |
| The white cabinets upon completion |
 |
| The black cabinets shown with some of the hardware on. I'm still waiting for the drawer pulls. |


Sunday, April 24, 2011
Pot Rack
Having a pot rack really clears up cabinet space, while providing even more of a rustic feel to the kitchen. I got this rack from Kitchen Kaboodle.


Saturday, April 16, 2011
Butcher Block Table
I was originally going to have a custom made butcher block table built to a specific size with an integral knife block and separate cutting board and all that jazz but it turned out to be way too expensive. I ended up getting this online for about half the price of the several bids I got. It's a bit smaller than I'd like but it's great to have.

 |
| Scully giving me that look. She's either waiting to go to the park or eat. |
Thursday, April 14, 2011
Trim and Molding
For the end of March/start of April, the remodel entered the finishing phase by installing the trim and molding. To me, the appeal of remodeling is venturing into things never attempted before, however cutting and installing molding which I've done a lot of still gives a ton of satisfaction. It's easy but yields great results......when done right, of course. I had to redo the garden window trim twice. It's best not to install trim when you're totally sleepy.
 |
| Window trim and the start of the picture rail in the breakfast nook. |
 |
| Base boards and trim around the fridge and bathroom door |
 |
| Bathroom and pantry door. I had to get fairly creative in this tight area. |

 |
| Quarter round to cover the gaps between the base board and hex tile. |
 |
| I didn't take any pictures of the crown molding, but here's a cell phone shot of my guide on how to set the saw up with regards to the orientation of the crown molding and angle of the saw. This is my 4th or 5th time cutting crown molding and it's STILL confusing. |
 |
| The garden window trim between attempts |
 |
| The finished garden window trim |
Subscribe to:
Posts (Atom)